
February 15, 2024
How to Care for Your Clarinet

Before Playing
- Always wash your hands and brush your teeth before playing your instrument. Dirt and oil from your hands can tarnish and damage the keys and pads. Cleaning your mouth will help preserve the pads and playability. If brushing your teeth is not possible, it is helpful to rinse your mouth out with water.
- If you wear jewelry, make sure it doesn't touch the clarinet. Loose jewelry can get caught on the instrument or damage the finish.
- Be aware of your surroundings as even light bumps can damage your clarinet.
How To Put Your Clarinet Together
Understanding how to properly assemble your clarinet will ensure that the instrument is not damaged while playing. Treat each piece of the clarinet with care, working from the bottom piece of the clarinet to the top.
- Before you open your case, be sure that it is right side up.
-
Twist the bell onto the lower joint. When joining the lower and upper joints, press the rings of the top joint to lift the bridge key. Make sure to place your hands carefully so you do not bend any keys.

- Align the bridge piece.


-
Twist on the barrel.

-
Twist on the mouthpiece.

-
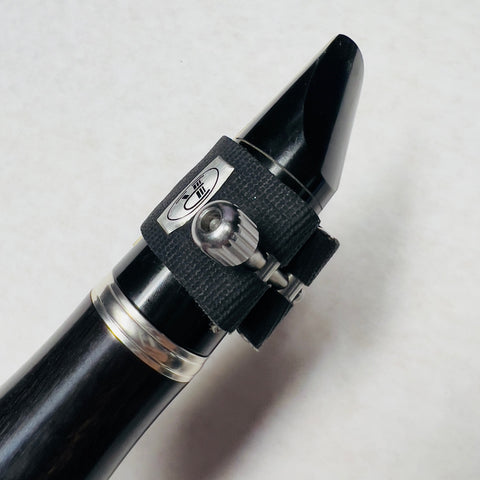
Carefully put on the reed and secure it with the ligature.


General Tips
- Avoid any rapid change of temperature and humidity. For example, do not leave the instrument in the hot sun, outdoors in winter, or near an air conditioner or heater.
- Always keep your clarinet in its case when you are not playing it. Never put anything into your case that it was not designed to hold because the pressure from papers or music can bend the rods and keys.
- Deep clean your mouthpiece occasionally. Be sure to use a small cup of lukewarm water mixed with PH-neutral soap, and Q-tips. Moisten the Q-tip with the lukewarm water and soap mixture. Clean the inside of the mouthpiece using the moistened Q-tip. Do not use abrasive materials to clean the mouthpiece, as it may damage the facing. A mouthpiece that is not cleaned often not only becomes unsanitary; the bore becomes smaller, and this affects the tone.
- Your clarinet reed has the most impact on your instrument’s tone and is essential to the clarinet’s sound. Be especially careful when handling the reed as it is very fragile. Soak your reed for two-three minutes in a cup of water before playing. Alternatively, place the reed in your mouth for a few minutes, using your saliva to moisten the reed before playing.
- Use cork grease - the proper way. As a rule of thumb, if the joint seems too tight when you assemble the instrument, applying a small amount of cork grease is helpful. If the joint is not tight, do not apply grease. To use: put a small portion on your pointer finger and spread it evenly to each of the cork tenons. Make sure that there are no clumps or excess grease. Although some people conscientiously apply grease every day, a cork that always has grease on it will simply absorb it. This may dissolve the adhesive between the cork and the body, causing the cork to crumble away in time. Additionally, since the grease is sticky, putting the instrument in the case in this condition may cause dust to adhere to the cork, which can eventually lead to damage to the body.
- Oil your keys three times a year. Apply small drops of key oil to the moving rods of the instrument. If you are not able to find key oil, you can use sweet almond oil. Be sure to not use too much oil - one small pin drop is sufficient.
- A yearly checkup with your local woodwind technician is important for maintaining the adjustments of your instrument.
- Clean your clarinet after every use!
How to Clean a Clarinet
Do NOT wash your clarinet using water. Water is NOT good for clarinets. If the pads that cover the tone holes become damaged by water, they will need replacement.
- Immediately after playing, be sure to disassemble the reed and ligature from the mouthpiece. Always remove your reed from your mouthpiece, wipe the excess moisture off of it, and place it in a reed guard. Wipe down your mouthpiece. Leave the ligature on the mouthpiece to keep it from getting bent, then replace the mouthpiece cap.
- Swab the entire clarinet (without mouthpiece) while assembled. Pass the clarinet swab through the instrument from the bell to the top of the instrument. Be sure to keep your swabs clean, as using a dirty swab defeats the purpose of cleaning the clarinet.
- Disassemble each part of the clarinet and pass the swab through each part of the instrument separately. Do not run the swab through the mouthpiece, as swabs are not made to pass through a small aperture; they can act as an abrasive that might damage the tip and/or change the facing of the mouthpiece.
- Wipe any moisture or excess cork grease off all the tenons. This will help prevent swelling between the joints that often lead to cracking. Be sure the tenon rings are tight and clean. Keeping the rings tight will help to avoid any wood cracking.
- Clean the outside: wipe down clarinet keys and body after playing - take a microfiber cloth to wipe down fingerprints and the natural oils from each part of the clarinet. Use a dry Q-Tip to clean the tone holes of the instrument as needed
- Place each part of the clarinet carefully back in its case. Be sure that each part of the clarinet is in the correct spot to prevent damage to the keys.
Congratulations! You've successfully cleaned your clarinet.
We hope your new instrument brings you many years of enjoyment.
Please don't hesitate to contact us if you need any advice or have questions!